If you’ve ever asked yourself, “How to make a hoverboard that you can ride on,” you’re in for a treat. Craftsmanship is an art, especially when it involves taking concepts from science fiction and bringing them to life.
This guide outlines the steps to make that hoverboard you saw Marty McFly smoothly glide on in “Back to the Future.” But remember, this isn’t a walk in the park, it’s going to require some elbow grease.
Key Takeaways
Hoverboards aren’t just a thing of science fiction; with some handy work, you can build your own to ride and impress your peers.
The rideable hoverboard we’re crafting requires specific materials, including sheets of plywood, pieces of wood, motor brackets, and two motors.
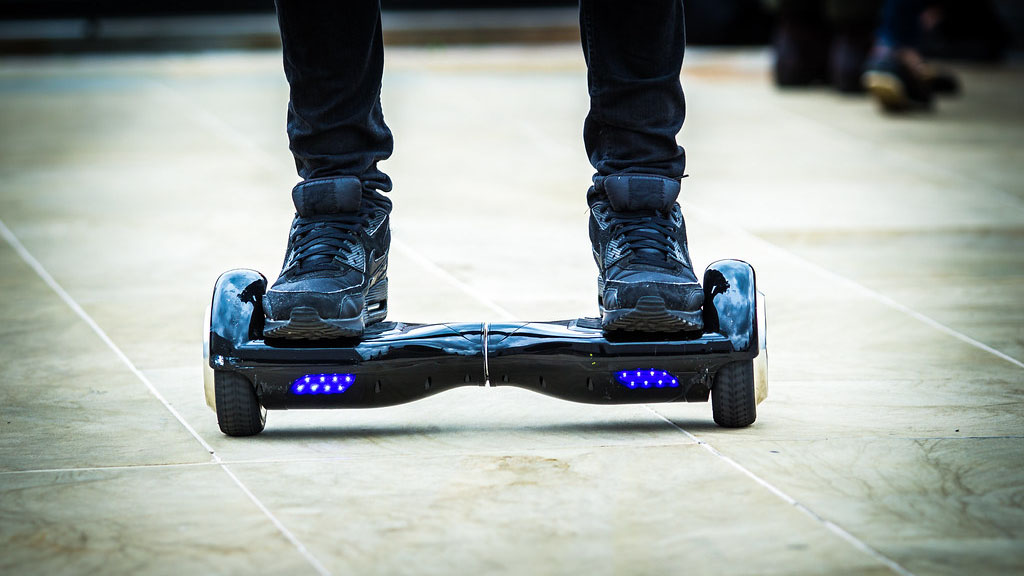
Safety is paramount; remember to always wear a helmet when you ride your hoverboard.
Step-by-Step Guide to Creating Your Own Hoverboard
Let’s start this hoverboard-building party.
Step 1 – Gathering the Essential Materials
Before diving head-first into this DIY hoverboard project, we must gather all our bits and pieces. It’s like a scavenger hunt, but in this case, we will tell you where to look. First, you need those plywood sheets for your frame.
But remember, you’re going to need three of them. One for the top, one for the bottom, and another for the inside. Imagine making a sandwich, but instead of bread and cheese, it’s plywood and tech.
Step 2 – Initiating the Crafting Process: How to Cut the Frame
It’s time to start crafting your hoverboard frame. Think of it as a jigsaw puzzle, but it’s a lot cooler. You have to cut those sheets of plywood to the proper size and shape. Blocky or round, it doesn’t matter so long as it fits your feet and the battery.
And remember, the idea is to ride your hoverboard, not put it in a museum. Don’t fret about perfect angles; just keep it functional and safe. Ok, let’s put that saw to work, buddy!
Identifying the Right Slot for the Battery
When making your DIY hoverboard, it’s essential to find the right spot for the battery. You see, the battery is the heart of this gadget, pumping power to all the necessary components. Now, you don’t want to just slap it in the middle like a sloppy joe on a bun.
No, you have to consider the weight distribution. It’s best to place the battery in the middle of the hoverboard frame. It will help maintain balance once you step onto the board – because, let’s face it, nobody wants to faceplant on their first ride out. So remember, bright as a lightbulb, right in the middle!
Spotting the Ideal Hole for the Wheels
Finding the perfect hole for the wheels – now we’re talking real business. Here’s a quick tip: don’t just drill in willy-nilly. Make sure your holes align with the wheels’ axles’ center. Also, the hole’s circumference should comfortably accommodate the full diameter of the solid rubber wheels.
Yeah, it might seem like rocket science at first, but once you get the hang of it, you’ll be sliding those wheels in smoother than butter on hot toast. To put it simply, match up, line up, then drill up.
Step 3 – Assembling the Frame and Components
Alright, once you’ve got your frame cut, the battery slot sorted, and the wheel holes drilled, it’s time to get your hands dirty. It’s like building a puzzle without a picture on the box. You’ve got to gather your pieces of wood, sheets of plywood, and your tools.
Start by aligning the components properly – remember, every piece has its place. Secure everything with good old-fashioned screws, and for an extra layer of security, Wood glue isn’t a bad idea. You’re on your way, sport!
Attaching the Wheels and the Balancing Wheel
The wheels are definitely the meal ticket. The balancing wheel plays a big part, too. It’s like the secret sauce on a well-made burger. When attaching the wheels, ensure they are held secure and firm. They need to be able to take the pressure when you’re whizzing down the street.
Mount the balancing wheel at the center – it will help you steer clear from unplanned somersaults while riding your hoverboard. Remember – tires firm, balance in place, and we’re in the race!
Mounting Brackets and Putting Together the Motors
Alright, now the motor brackets and the two motors come into play. These are critical for the hoverboard’s operation. Akin to the gears of a clock, without them, everything comes to a screeching halt.
The brackets should be securely fastened to the frame, and the motors should align with the wheels for a smooth power transfer. Keep your screws tight and your alignment right. You’re almost at the finish line, champ; keep the energy high!
Step 4 – The Wiring Process and Adding the Final Touches
The thrilling journey of constructing your hoverboard is about to reach its peak! So, things are about to get electrifying – literally. Now, we’re dealing with the grand task of wiring all these tiny bits and pieces. Every tug and pull of the wires matters, and it’s crucial to be precise, like those guys who set fireworks at the city fair.
Fitting the Top and Adding Elastics
Slapping on the top of your hoverboard will feel like putting the cherry on top of a sundae, satisfying yet still sweet. Here’s where you fit the top sheet of plywood into place, ensuring it aligns well with the frame you’ve labored over.
Imagine it like finally finding that missing piece of the jigsaw puzzle you’ve been working on for days. Secure it well with screws or nails, as you don’t want it running off midway when you ride your hoverboard. After that, you need to add some elastics to keep things in check.
No, not those rubber bands you stole from your kids’ craft box, but sturdy, heavy-duty elastics, the kind you might see on a trampoline. You see, these elastics act as the glue, keeping the whole thing intact. They ensure your ride is smooth sailing and not some jerky rodeo experience.
Assessing the Finished Hoverboard
Alright then! Now comes the victory lap, where you get to admire your hard work. Assess the finished hoverboard like a chef tasting his pie before serving it up. You’ve got to do more than just look. Give it a good shake, a few pokes, and anything else to ensure all parts are well secured.
Check the wiring, the top fitting, the elastics, everything. Remember, this isn’t just some toolshed project; you’re going to ride this thing. Safety first! If everything is as snug as a bug in a rug, then my friend, give yourself a pat on the back.
With the help of some pieces of wood, clever wiring, and solid rubber, the Marty McFly in you has finally built your own hoverboard. Time to glide around and enjoy the ride!
Motor brackets play a crucial role in holding the two motors in place and ensuring a smooth transition of power while you ride your hoverboard. Without them, it’s like trying to drive with loose wheel nuts. Not a pretty picture, eh?
When we talk about plywood or pieces of wood in the context of a DIY hoverboard, we usually refer to the base and the top part. They give your ride stability and a platform to stand on. Almost like bread for a sandwich!
If you don’t get the wiring right, your hoverboard might not work efficiently or not at all. Incorrect wiring might also potentially cause the motors to overheat or drain the battery prematurely. It’s sort of like trying to run your car without engine oil. You must get it right!
Concluding Thoughts: Hoverboarding to New Heights!
That’s it, buddy! You see, building a hoverboard, folks isn’t for the faint of heart. The complexity of making one is up there. To create a rideable hoverboard project, you must gather essential materials, cut the frame, and assemble it all, just like a good old-fashioned jigsaw puzzle.
Remember, the role of wheels, typically of solid rubber, and even the skateboard frame are paramount in crafting a DIY hoverboard. Wiring is a phase unto itself; adding the top and adjusting the elastics requires precision.
Before you set foot on your self-made self-balancing scooter, hold your horses. Double-check everything and assess the result to ensure it’s sturdy and safe. Finally, wear a helmet because, as with everything fast and fun, safety comes first now that you know how to make a hoverboard that you can ride on.
Hi! My name is Johnathan, and I am the creator of ScooterAdvice360.com. Having been riding motor scooters and bikes for over 20 years, I have picked up a few things! I ran my own scooter store in Florida, selling all manner of motor scooters, mobility scooters, hoverboards, e-scooters and accessories, from Forzas to Vipers, Hellcats to Vespas.
Here, at ScooterAdvice360.com, I want to ensure everyone has access to the information that they need to enjoy their bikes and scooters for longer.