Hoverboards are a super fun way to get around once you know how to ride them, but it’s not quite as intuitive a vehicle as many are used to. Knowing how to ride hoverboard is a must to ensure safety and enjoyment.
It’s not that there are only two wheels (we’re all familiar with bicycles, scooters, and motorbikes) but the fact those two wheels are side by side rather than in-line throws us off… sometimes literally!
Not to worry, though, as we’ve put together this comprehensive, fool-proof guide on how to ride hoverboard. Stick with us, and you’ll be cruising with style and ease in no time.
Safety First
If you want to know how to ride hoverboard like a pro, you have to make peace with the fact that you’re almost certainly going to take a tumble from time to time, especially in your first few weeks of riding.
So, kitting yourself out with all the necessary safety gear is an absolute must.
We’re talking…
A quality helmet
Knee guards
Elbow pads
Wrist guards
Padded shorts
Once you’re up and riding, some form of lighting to improve your visibility is essential.
If your hoverboard doesn’t have any integrated lights, you should incorporate some into your riding outfit.
Shoe lights are a popular way to go about it, but any bright light worn somewhere visible on your body will do the trick.
You might also want to consider reflective clothing.
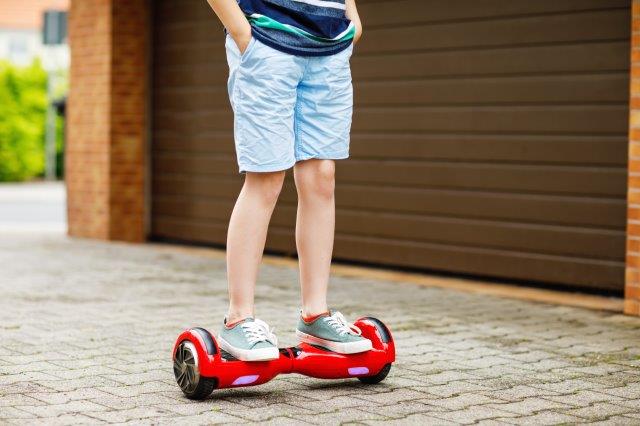
Steps to Follow on How to Ride Hoverboard
With the safety concerns addressed, it’s time to get down to business! Here are the steps to follow on how to ride hoverboard:
How To Mount A Hoverboard
Before you know how to ride hoverboard, you first need to learn how to safely mount it.
The key to success when mounting a hoverboard is to prepare yourself for a balancing challenge the likes of which you’ve never encountered.
Sure, if you have experience riding things like skateboards, you’ll have slightly better balance in general, but it won’t help you right away.
In light of this, it’s best to be cautious when first stepping aboard. Here’s how it’s done.
Step 1 —Switch the hoverboard on. Hoverboards utilize self-balancing technology to improve stability, but when they’re switched off, the stability goes out the window, making them nigh-on impossible to mount.
Step 2 —Check the user manual of your hoverboard to see if it has a learning mode. Such a mode will reduce movement and make balancing easier for beginners.
Step 3 — Find a grassy area. Grass is much more forgiving when you fall over, and the privacy of your yard may save you some of the embarrassment as well.
Step 4 —Place your first foot on the board. It’s always best to start with your dominant foot, as it’s stronger and offers better balance.
Place it so the outside edge of your shoe is right up against the inside edge of the wheel arch. In other words, it should be pushed as close to the wheel as possible.
Your toes should be hanging over the front of the board ever so slightly, as should your heel on the other side.
Step 5 —Place your second foot on the board. Repeat the same process for your second foot, remembering to stay relaxed. Tension reduces flexibility, and if you’re not loose-y-goose-y, you’ll have trouble balancing.
Step 6 —Stay as straight and still as you can. Whatever you do, don’t try to move. Just familiarize yourself with the feeling of standing on the board.
How To Dismount A Hoverboard
A lot of guides dive straight into the riding after mounting guidelines, and while you’re no doubt excited to get going, we believe it’s always a good idea to practice dismounting before you make your first moves.
The more accustomed to the process you are, the easier it will be to execute in action.
Step 1 — Shift your weight to your strong foot. You’ll want to step off with your less-dominant foot first so your dominant foot can handle the rigors of stabilization on the board.
You should step back off the board rather than forward, otherwise, you may lose your balance, causing the board to move, possibly tripping you up.
Step 2 —Shift your weight to your less-dominant foot. Now it’s time to free your last foot from the board, and to do so, you’ll shift your weight backwards onto your grounded foot.
Step 3 —Remove your foot from the board.
How To Ride A Hoverboard
Here’s what you’ve been waiting for!
Moving forward — Lean ever so slightly forward from the ankles.
Moving in reverse — Lean ever so slightly backward from the ankles.
Turning right — Shift your weight to the right. Tilt to the right to turn more aggressively.
Turning left — Shift your weight to the left. Tilt to the left to turn more aggressively.
Spinning in circles — Shift weight and tilt continuously to one side.
Speeding up — Lean forward continuously. Most hoverboards top out at about 10 mph and will signal this threshold with a beep (see also: Why Is My Hoverboard Beeping?)of some description.
If you hear the beep, it’s best to slow down a little, as some hoverboards will automatically shut down if the top speed is exceeded, which can cause a tumble.
Slowing down — Straighten up, but don’t lean backwards. The trick is to bring the speed of the hoverboard down gradually.
Tackling inclines — The user manual of your hoverboard will give you a gradient limit, but it’s tricky to assess the angle of a slope in real time, so the best advice we can give you when tackling hills is to take it easy.
Move steadily, exploring what the board is capable of and how you should move to get the most out of it.
Once you’re a more experienced rider, you’ll be far more adept at judging how to tackle hills.
We’d suggest spending a few days practicing mounting and dismounting before you try to move, but once you’re feeling comfortable, give it a whirl. You never know; you might be a natural.
Frequently Asked Questions
What Shouldn’t You Do When Learning How To Ride A Hoverboard?
It can be tempting to bend your knees when learning how to ride a hoverboard, (see also: How Old Do You Have To Be To Ride A Hoverboard?)but standing up straight distributes weight most evenly.
Looking down is also a big no-no on a hoverboard, as you need to be aware of what’s in front of you at all times.
You should also match terrain to your skill level.
Start off on smooth level ground, only moving onto more challenging surfaces when you’re a confident rider.
Where Can I Ride My Hoverboard?
You can ride a hoverboard pretty much anywhere but for busy roads.
That said, although they’re not banned on sidewalks, cycle paths, and recreational trails, local authorities may have their own rules that state otherwise.
Hi! My name is Johnathan, and I am the creator of ScooterAdvice360.com. Having been riding motor scooters and bikes for over 20 years, I have picked up a few things! I ran my own scooter store in Florida, selling all manner of motor scooters, mobility scooters, hoverboards, e-scooters and accessories, from Forzas to Vipers, Hellcats to Vespas.
Here, at ScooterAdvice360.com, I want to ensure everyone has access to the information that they need to enjoy their bikes and scooters for longer.